How to Automatically Login into Laravel App in Your Local Dev Environment
I often find myself spinning up Laravel projects for prototypes and idea testing and then letting them sit until I can pick them back up. Logging in whenever I start work gets annoying, and there’s no point in manually logging in to my local instance since my account is the admin. Fortunately, there are a few solutions to automate this process in Laravel. I’ll delve into the various methods to automatically log in to your Laravel app in your local development environment, enhancing your workflow and boosting productivity.
Utilizing session-based auto-login:
One approach to automate the Laravel application’s login process is session-based auto-login. This method involves setting up a mechanism that automatically logs in a predefined user whenever the application is accessed in the local development environment.
Each solution below assumes you’ve seeded or registered a local user account in your database.
1. Creating a custom route for auto-login:
You can create a custom route in your Laravel routes file (routes/web.php) that triggers the auto-login functionality.
// routes/web.php

Route::get('/auto-login', function () {
    $user = App\Models\User::find(1); // Fetch the user you want to auto-login
    Auth::login($user);
    return redirect('/dashboard'); // Redirect to a specific page after login
});
2. Implementing auto-login logic:
When you access the /auto-login route in your local development environment, Laravel will automatically log in the specified user, redirecting them to the desired page (in this case, /dashboard).
Leveraging custom middleware for auto-login:
Another method to automate your Laravel application’s login process is leveraging custom middleware designed for auto-login functionality. This approach provides more flexibility and control over the auto-login process, allowing you to define custom logic and conditions for authentication.
1. Creating a custom middleware for auto-login:
Generate a new middleware using the Artisan command make:middleware.
php artisan make:middleware AutoLoginMiddleware2. Registering the middleware in Laravel:
Register the custom middleware in the HTTP kernel (app/Http/Kernel.php) to apply it to the desired routes or groups of routes.
// app/Http/Kernel.php

protected $middlewareGroups = [
    'web' => [
        // Other middleware...
        \App\Http\Middleware\AutoLoginMiddleware::class,
    ],
];
Registering in the Boot method in AppServiceProvider:
This method allows you to log in automatically as soon as you load the application loads and is the method I use most often. I added a check to ensure that the environment is local.
		if ($this->app->environment('local')) {
			$user = User::first();
			if (isset($user)) {
				$this->app['auth']->setUser(User::first());
			}
		}
Bonus: Generating a seeder for the Users table
Sometimes, you might want to seed your database with an admin user for testing purposes. Here’s how you can do it:
A. Creating a UserSeeder class:
Generate a new seeder class using the Artisan command make:seeder.
php artisan make:seeder UserSeederB. Seeding the database with an admin user:
Within the generated UserSeeder class, define the logic to create an admin user.
// database/seeders/UserSeeder.php

use Illuminate\Database\Seeder;
use Illuminate\Support\Facades\Hash;
use App\Models\User;

class UserSeeder extends Seeder
{
    public function run()
    {
        User::create([
            'name' => 'Admin',
            'email' => 'admin@example.com',
            'password' => Hash::make('password'), // Change this to something more secure
            // Additional user data...
        ]);
    }
}
Finally, run the seeder using the Artisan command db:seed.
php artisan db:seed --class=UserSeederBy following these steps, you can seamlessly integrate auto-login functionality into your Laravel application’s local development environment, thereby reducing the time and effort spent on repetitive login tasks. Additionally, seeding your database with an admin user ensures that you have a user account available for testing and development purposes.
How to enable MacFuse/PCloud Drive on Mac Sonoma 14.2.1
I recently upgraded to Mac Sonoma 14.2.1 and MacFuse stopped loading which affected my ability to load PCloud and NTFS drives. I spent a few days trying to troubleshoot everything and in the end it turned out I had to disable Mac System Integrity Protection to get everything to load. I’m sharing in case it helps anyone else.
To disable SIP on your Mac Sonoma for extensions like MacFuse and pCloud Drive:
- Shut down your Mac: Turn off your Mac completely by pressing and holding the power button until the screen goes black.
- Restart in Recovery Mode: Enabling Recovery Mode depends on your Mac. You can try the steps below or follow Apple’s guide here.
Power on your Mac and immediately press and hold Command (⌘) + R to enter Recovery Mode.
Power on your Mac and hold the power button down until Other Options displays. - Open Terminal: In Recovery Mode, select “Utilities” in the macOS Utilities window and select “Terminal.”
- Disable SIP: Type
csrutil disablein Terminal and press Enter. This disables System Integrity Protection (SIP). - Restart Mac: Click the Apple menu and select “Restart” to reboot your Mac with SIP disabled.
- Re-enable SIP (if needed): Follow the same steps but use
csrutil enablein Terminal to re-enable SIP.
Note: Disabling SIP poses security risks. Re-enable it once you’ve installed the necessary extensions. Only disable SIP when necessary and understand the potential risks involved.
Installing font awesome pro with bun
After recently switching to bun.sh, I was trying to install Font Awesome Pro. It uses a private registry but their docs have not been updated to support non-npm package managers and bun does not yet support .npmrc files.
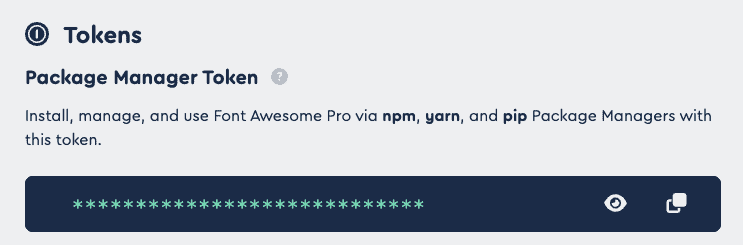
You can configure a private registry using an organization scope. First, you must get your auth token from your paid Font Awesome account by going to your account page, scrolling down to the Tokens section, and copying the token.
Copy and paste this string, and replace YOUR_TOKEN_HERE with the token you copied above:
[install.scopes]
"@fortawesome" = { token="YOUR_TOKEN_HERE" , url =
"https://npm.fontawesome.com/"}
Open the terminal and enter these commands:
touch $HOME/.bunfig.toml
nano $HOME/.bunfig.toml
Paste in the config above with your token and then hit CTRL+X to quit, and Y to save when prompted. Now you should be able to run
bun add @fortawesome/fontawesome-proHow to Delete Folder with Special Character in Windows 10/11
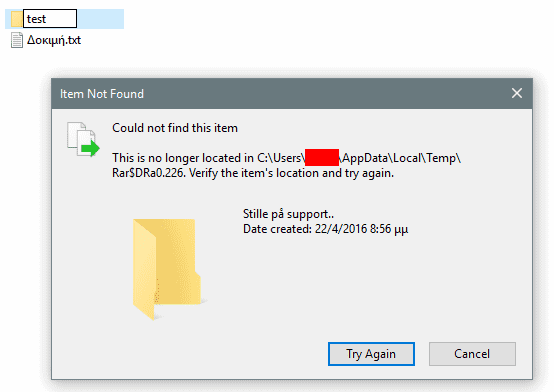
I ran into an issue where a folder was created by some application with a special Unicode character that Windows Explorer doesn’t seem to play nicely with. I also was unable to tell what the character was since nothing would reveal it. The folder’s there, but you can’t rename or delete it. If I tried to remove or delete it, I’d get an error saying the folder doesn’t exist:
I have LockHunter installed but it wasn’t able to delete it for some reason. The easiest way I found to delete the folder was to use Git Bash and then use the appropriate commands to rename or delete the folder.
Browse to the folder where the offending folder is located. For example purposes, I’ll use c:\temp\folder1
cd c:/tempRename:
mv fol (hit tab to autocomplete) folder1Delete:
del fol (hit tab to autocomplete)If you don’t have Git Bash or are not a developer/power user, you can download the portable version from https://git-scm.com/download/win to use temporarily. Once you decompress the files to a folder, you’ll find git-bash.exe which you can double-click to run and use the above commands.
Add GTM to Gatsby using Helmet
One of my devs needed to add Google Tag Manager (GTM) to an older Gatsby project we built and he was running into issues implementing the GTM code provided by Google since the react-google-tag-manager package required a newer version of Gatsby and its dependencies.
The issue turned out to be that the strings needed to be escaped for Helmet/React to process it correctly. If you’re using an older version of Gatsby, the snippet below should help you add GTM and call your events as needed. Just add it to your main template file.
const googleAnalyticsId = 'your-google-id-here'

<Helmet>
      <script async src={`https://www.googletagmanager.com/gtag/js?id=${googleAnalyticsId}`}></script>
      <script>
        {`
          window.dataLayer = window.dataLayer || [];
          function gtag(){dataLayer.push(arguments);}
          gtag('js', new Date());
          gtag('config', "${googleAnalyticsId}");
        `}
      </script>
</Helmet>How to use Backblaze B2 with Laravel
I am working on a Laravel project and decided to use a Backblaze bucket as it’s cheaper for storage when compared to AWS S3. I couldn’t find a tutorial on how to get it working from scratch and I tested a bunch of Laravel B2 libraries that didn’t end up working. The good news is that you don’t need a special B2 plugin and instead can use the S3 package recommended by the Laravel docs.
If you haven’t added the flysystem-aws-s3 package, add it to your project using composer:
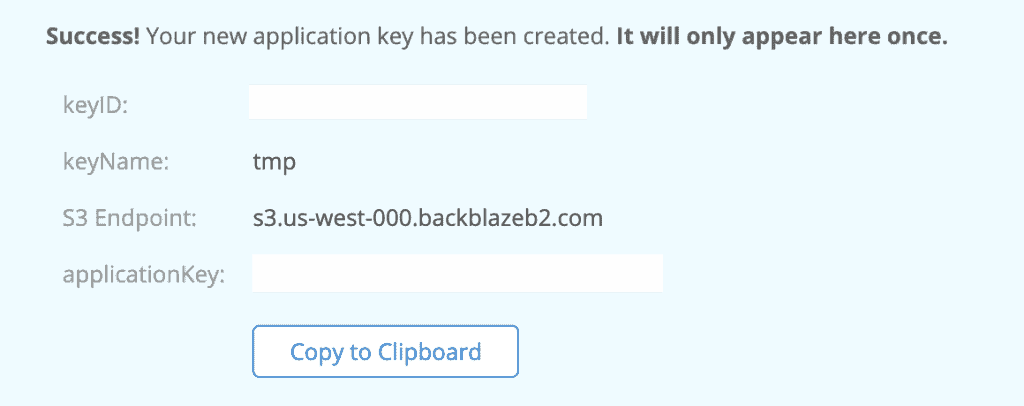
composer require league/flysystem-aws-s3-v3Login to your B2 account and create your bucket with your required settings. Once created, you’ll want to create a new application key with the permissions you need for your app. You should get a confirmation once it’s generated:
Open your .env file and locate the settings for AWS. You’ll need to add one key that’s not there by default:
AWS_ENDPOINT=Match the settings in your .env from the application key to the values below.
AWS_ACCESS_KEY_ID=keyID
AWS_SECRET_ACCESS_KEY=applicationKey
AWS_DEFAULT_REGION=us-west-000
AWS_BUCKET=bucket-name
AWS_ENDPOINT=S3 Endpoint
Now you should be able to call the Laravel storage system like normal:
\Storage::disk('s3')->put('test.txt', 'test');How to Setup a CI/CD Pipeline for Storybook.js using Gitlab
I just spent a few hours setting up a Gitlab pipeline to deploy a Storybook.js site. Of course the end result ended up being much simpler than I made it out to be. Like everything else on my blog, I’m sharing in case anyone else can use the information to save time.
Just put this in your gitlab-ci.yml and it’ll take care of caching the node modules and building your static version of Storybook to deploy.
image: node:latest

cache:
  paths:
    - node_modules/

stages:
 - build
 - deploy

build:
  stage: build
  script:
    - npm install
    - npm run build-storybook -- -o storybook-static
  artifacts:
    paths:
    - storybook-static
  only:
  - qa
  - develop
  - master

deploy:
  stage: deploy_to_aws
  # add your deploy code here
How to Clear Archive & Read-only flags on Files in Windows in Bulk
I ran into an issue where I had to move files from one system to another and was running into issues because files had been set as read-only, had the archive flag set, or both. It was causing the system to skip files which wasn’t acceptable. Normally you could just use Windows to clear it in bulk, but that could potentially mess up file permissions. I needed a way to automatically just clear all flags but respect permissions.
I did some searching and didn’t find a utility that would do the job and most of the solutions I found required Powershell which wasn’t available on the system I was on. I ended up writing a quick console application in C# to do the trick. I’ve made it free and open sourced it in case anyone wants to use it.
If you need just the app, you can find the release build here with instructions. The app also prompts for input to make things a bit easier to use. There’s no install, no tracking or metrics, or anything else related to privacy concerns in this app. It’s a simple throwaway utility to get the job done and move on.
https://github.com/gregvarghese/clearflags/releases/tag/1.0.0
If you want to see the source code, that is available here:
https://github.com/gregvarghese/clearflags/
Please note that I did this in about 10 minutes for my own use so error handling is pretty much non-existent. I mention this because I did run into one issue where Windows was somehow seeing a folder with files in it as a file and it couldn’t be deleted or renamed and the utility couldn’t get past it until it was resolved. I didn’t spend much time debugging and just used my Mac to rename the folder and Windows was able to recognize it after the change, so the utility was able to continue processing.
How to Generate a Page for Each Day of Month in Microsoft Word using VBA
I briefly joined my wife at her practice to help her grow the business and figure out how to make things more efficient. One of the things I learned is that my wife created a sign-in sheet for the office in Microsoft Word. Every week she would open the file and manually enter the date for each day of the week and then print out the documents. I took over the responsibility for a month and it annoyed me due to how inefficient the process was and I decided to automate the entire thing. I couldn’t find a solution to the problem online so I had to roll my own and am sharing the code in case someone else can benefit from it.
Important Details
The script will calculate the first day and last day of the month and then do a loop to append the date in the “Day, Month day, Year” format (i.e. Thursday July 17, 2019) to a text field.
There are a few important steps involved to get the script working as is:
- Create a Word doc with the first page that you want to duplicate.
- Add a text field from the developer tab. To copy and paste the code below as-is, you’ll need to name it txtDate. This is where the date will be added. If you want a different field name, change the name at line 26 and 83. You can also change the date formats to suit your needs here as well.
- Add a second blank page to the document. I was running into issues where the paste was appearing partially on the first. The blank page resolved this and I added code to remove the original page as well as the blank one from the beginning.
How to Use
Open up Word, then open up VBA, and copy and paste this snippet into a module. When you run the function, it’ll create a copy for every day of the month. I also created a function to start at a specific date in case you run it in the middle of the month.
Sub CreateSigninsForMonth()
    Dim N As Integer
    Dim sCurrentMonth, sCurrentYear As String
    Dim sNewDate As String

    N = 1

    Count = Day(GetLastDayOfMonth)

    For CopyNumber = 1 To Count

        With Selection
            .GoTo wdGoToPage, wdGoToAbsolute, 1
            .Bookmarks("\Page").Range.Copy
            .Paste
        End With

        With ActiveSheet

         sCurrentMonth = Format(Date, "mmmm")
         sCurrentYear = Format(Date, "yyyy")
         sNewDate = (CopyNumber & " " & sCurrentMonth & " " & sCurrentYear)

        ActiveDocument.FormFields("txtDate").Result = Format(sNewDate, "DDDD MMMM dd, YYYY")

        End With
        N = N + 1
    Next CopyNumber

    'Delete template + blank page
    For i = 1 To 2
    With ActiveDocument
        strt = .GoTo(wdGoToPage, wdGoToLast).Start
        Set r = .Range(strt - 1, .Range.End)
        r.Delete
    End With
    Next

End Sub

Sub CreateSigninsForMonthStartingDate()
    Dim Count As Integer
    Dim N As Integer
    Dim sCurrentMonth, sCurrentYear As String
    Dim sNewDate, sEndDay As String

    N = 1
    Count = 0

    iStartDay = InputBox("Which day do you want to start on?", "Starting Day", "1")
    Count = InputBox("Which day do you want to end on?", "Ending Day", Day(GetLastDayOfMonth))

    Do While Count > Day(GetLastDayOfMonth)
        sEndDay = InputBox("Which day do you want to end on?", "Ending Day", Day(GetLastDayOfMonth))

        If iStartDay = vbNullString Or sEndDay = vbNullString Then
            MsgBox "You clicked cancel.", vbOKOnly, "Try again later!"
            Exit Sub
        End If

        If IsNumeric(CInt(sEndDay)) Then
            Count = CInt(sEndDay)
        End If
    Loop

    For CopyNumber = iStartDay To Count

        With Selection
            .GoTo wdGoToPage, wdGoToAbsolute, 1
            .Bookmarks("\Page").Range.Copy
            .Paste
        End With

        With ActiveSheet

         sCurrentMonth = Format(Date, "mmmm")
         sCurrentYear = Format(Date, "yyyy")
         sNewDate = (CopyNumber & " " & sCurrentMonth & " " & sCurrentYear)

        ActiveDocument.FormFields("txtDate").Result = Format(sNewDate, "DDDD MMMM dd, YYYY")

        End With
        N = N + 1
    Next CopyNumber

    'Delete template + blank page
    For i = 1 To 2
    With ActiveDocument
        strt = .GoTo(wdGoToPage, wdGoToLast).Start
        Set r = .Range(strt - 1, .Range.End)
        r.Delete
    End With
    Next

End Sub

Function GetFirstDayOfMonth(Optional dtmDate As Date = 0) As Date

    ' Return the first day in the specified month.
    If dtmDate = 0 Then
        ' Use the current date if none was specified
        dtmDate = Date
    End If

    GetFirstDayOfMonth = DateSerial(Year(dtmDate), Month(dtmDate), 1)

End Function

Function GetLastDayOfMonth(Optional dtmDate As Date = 0) As Date

    ' Return the last day in the specified month.
    If dtmDate = 0 Then

         ' Use the current date if none was specified
        dtmDate = Date

    End If

    GetLastDayOfMonth = DateSerial(Year(dtmDate), Month(dtmDate) + 1, 0)
End FunctionHow to Get Laravel Debugging to work with PHPStorm and MAMP Pro 5
This has been one of the more aggravating things I’ve had to deal with in setting up software for development. I’ve followed the official documentation from JetBrains, over 30 other blog tutorials, and literally failed in getting any of them to work.
I figured out an easy way to make the setup work so I’m sharing it in case someone else finds it useful and for self-reference since I’ll probably forget how to do this again in 6 months when I start a new project.
MAMP Configuration
- Load MAMP and setup your host. Make note of the host name as you will need it to configure PHPStorm.
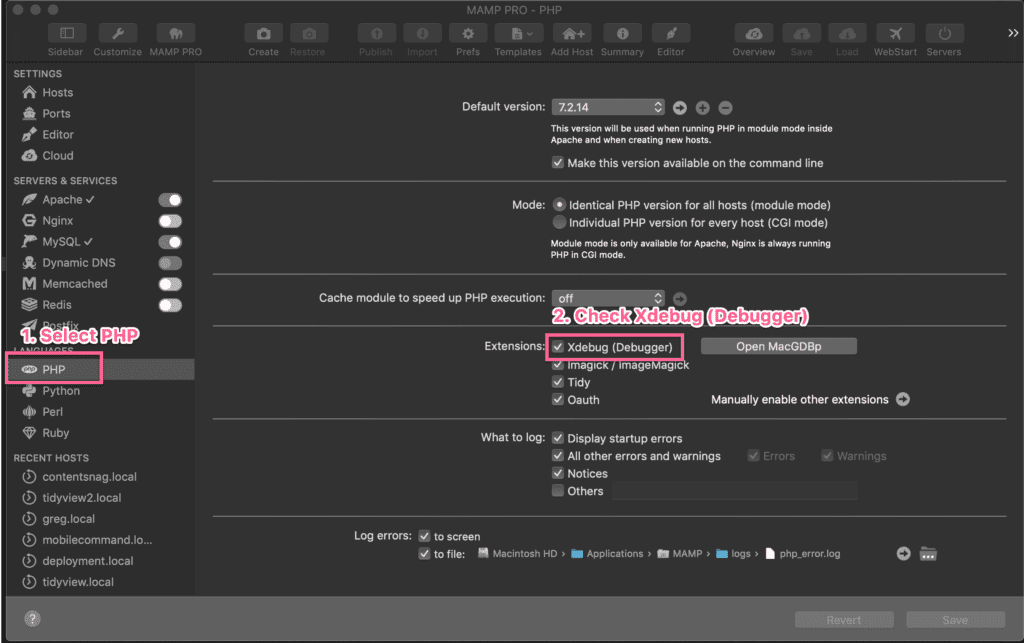
- Go to PHP on the left under Languages.
- On the right under Extensions, check Xdebug (Debugger).
PHPStorm Configuration
- Load PHPStorm and load your Laravel project.
- Setup your PHP executable and interpreter as per the official documentation and then resume here.
- On the top right of PHPStorm, select Edit Configurations from the dropdown.

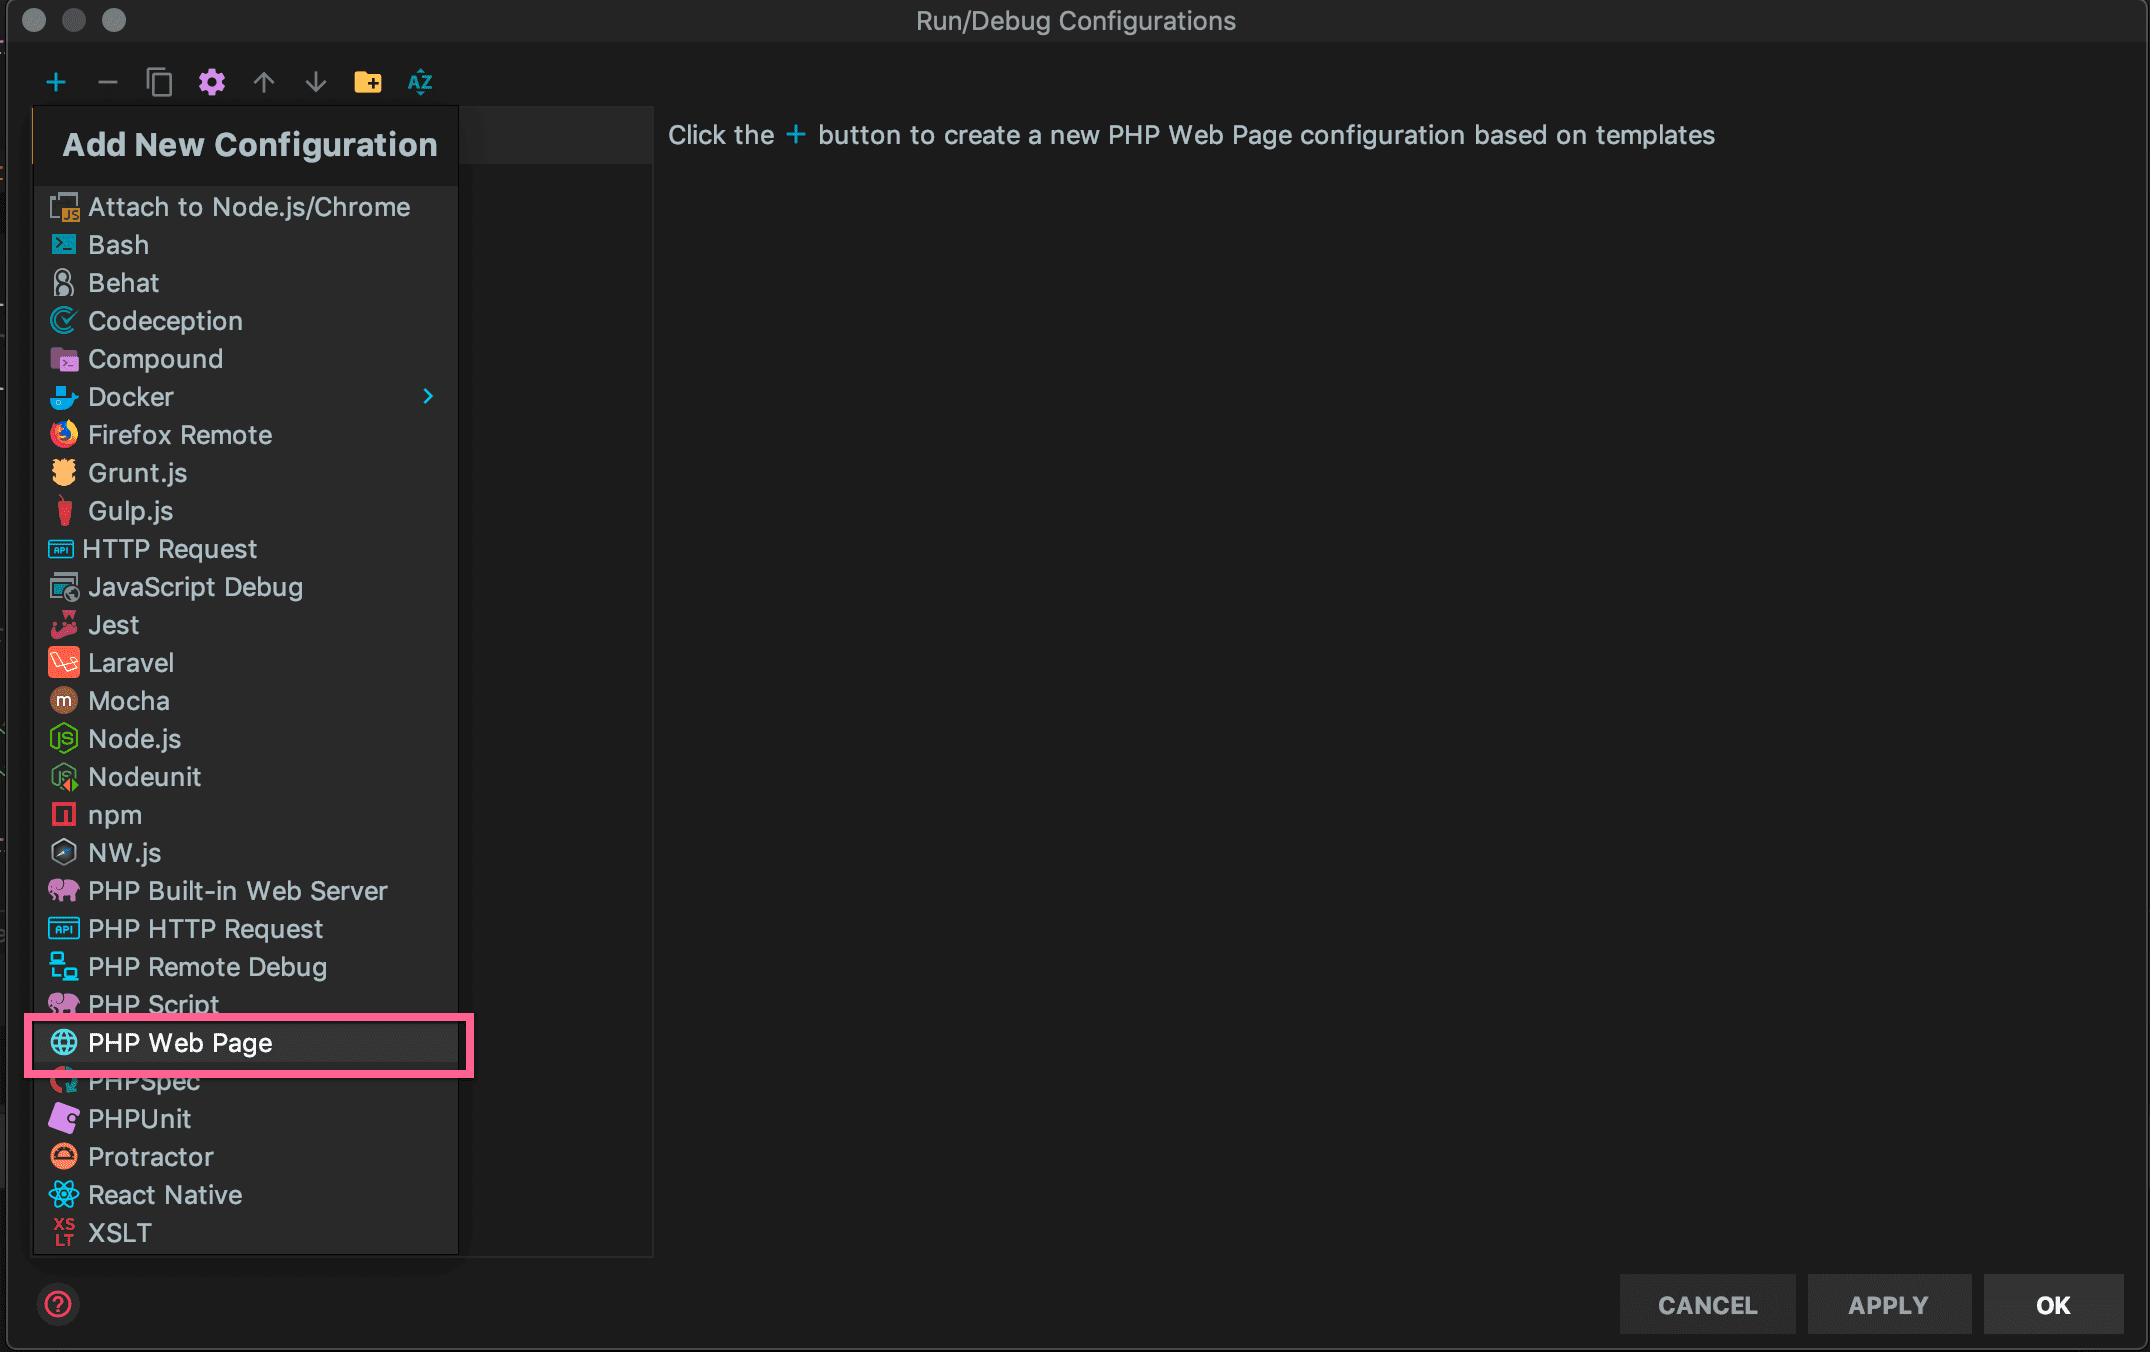
- Click on the Plus Button on the top left of the dialog and then select ‘PHP Web Page’.

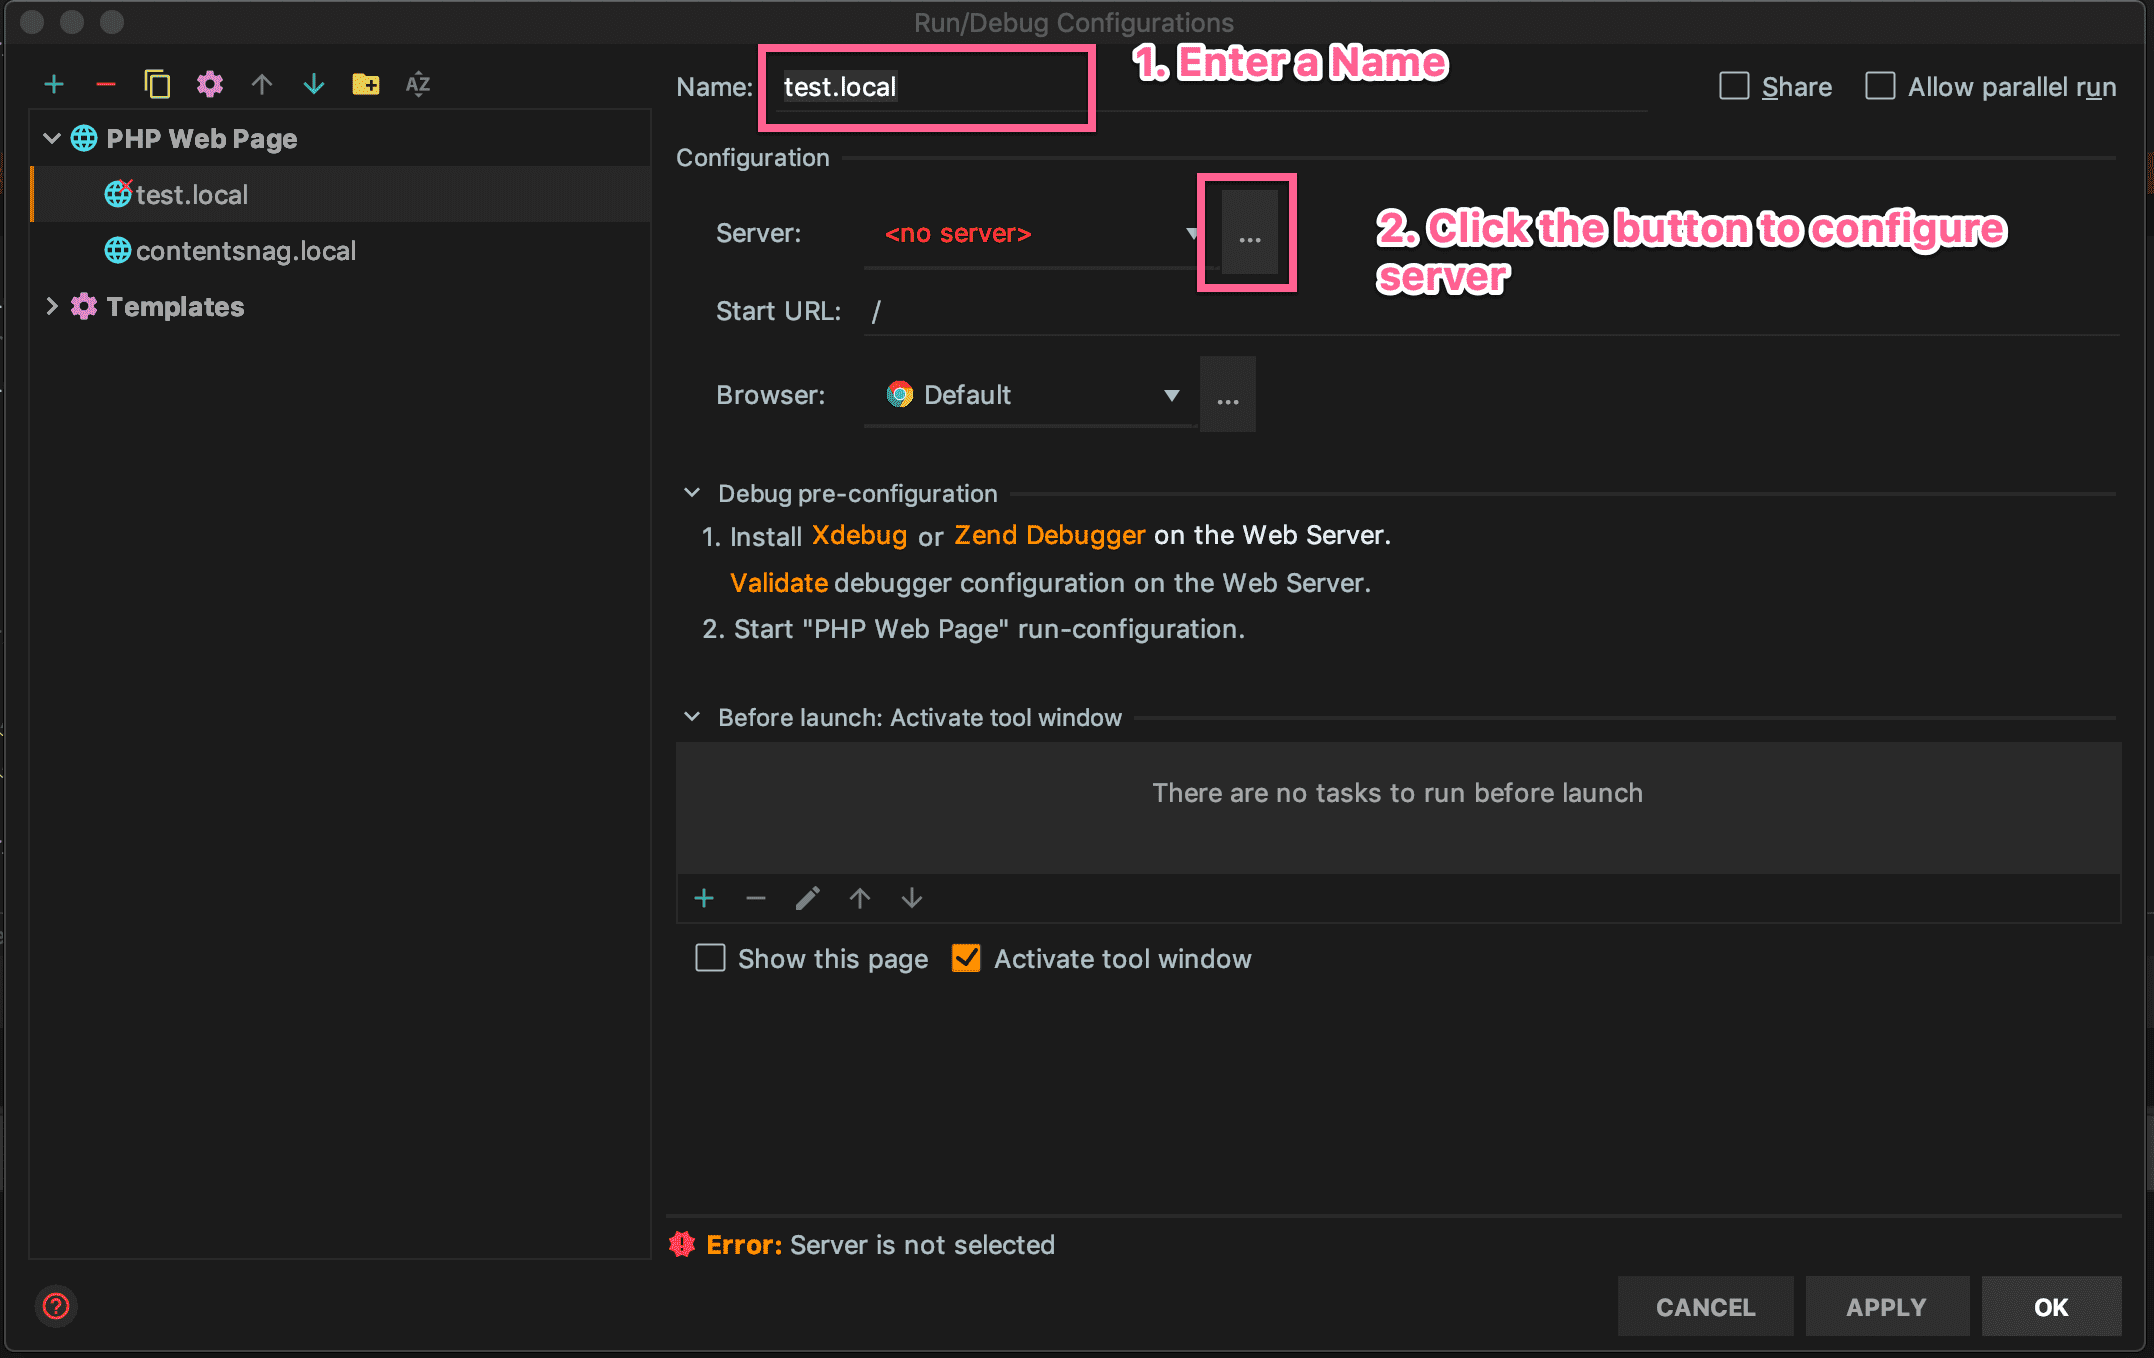
- Enter a descriptive name in the textbox. I use the host name from MAMP so it’s easy to identify visually. Click on the 3 dots with next to Server.

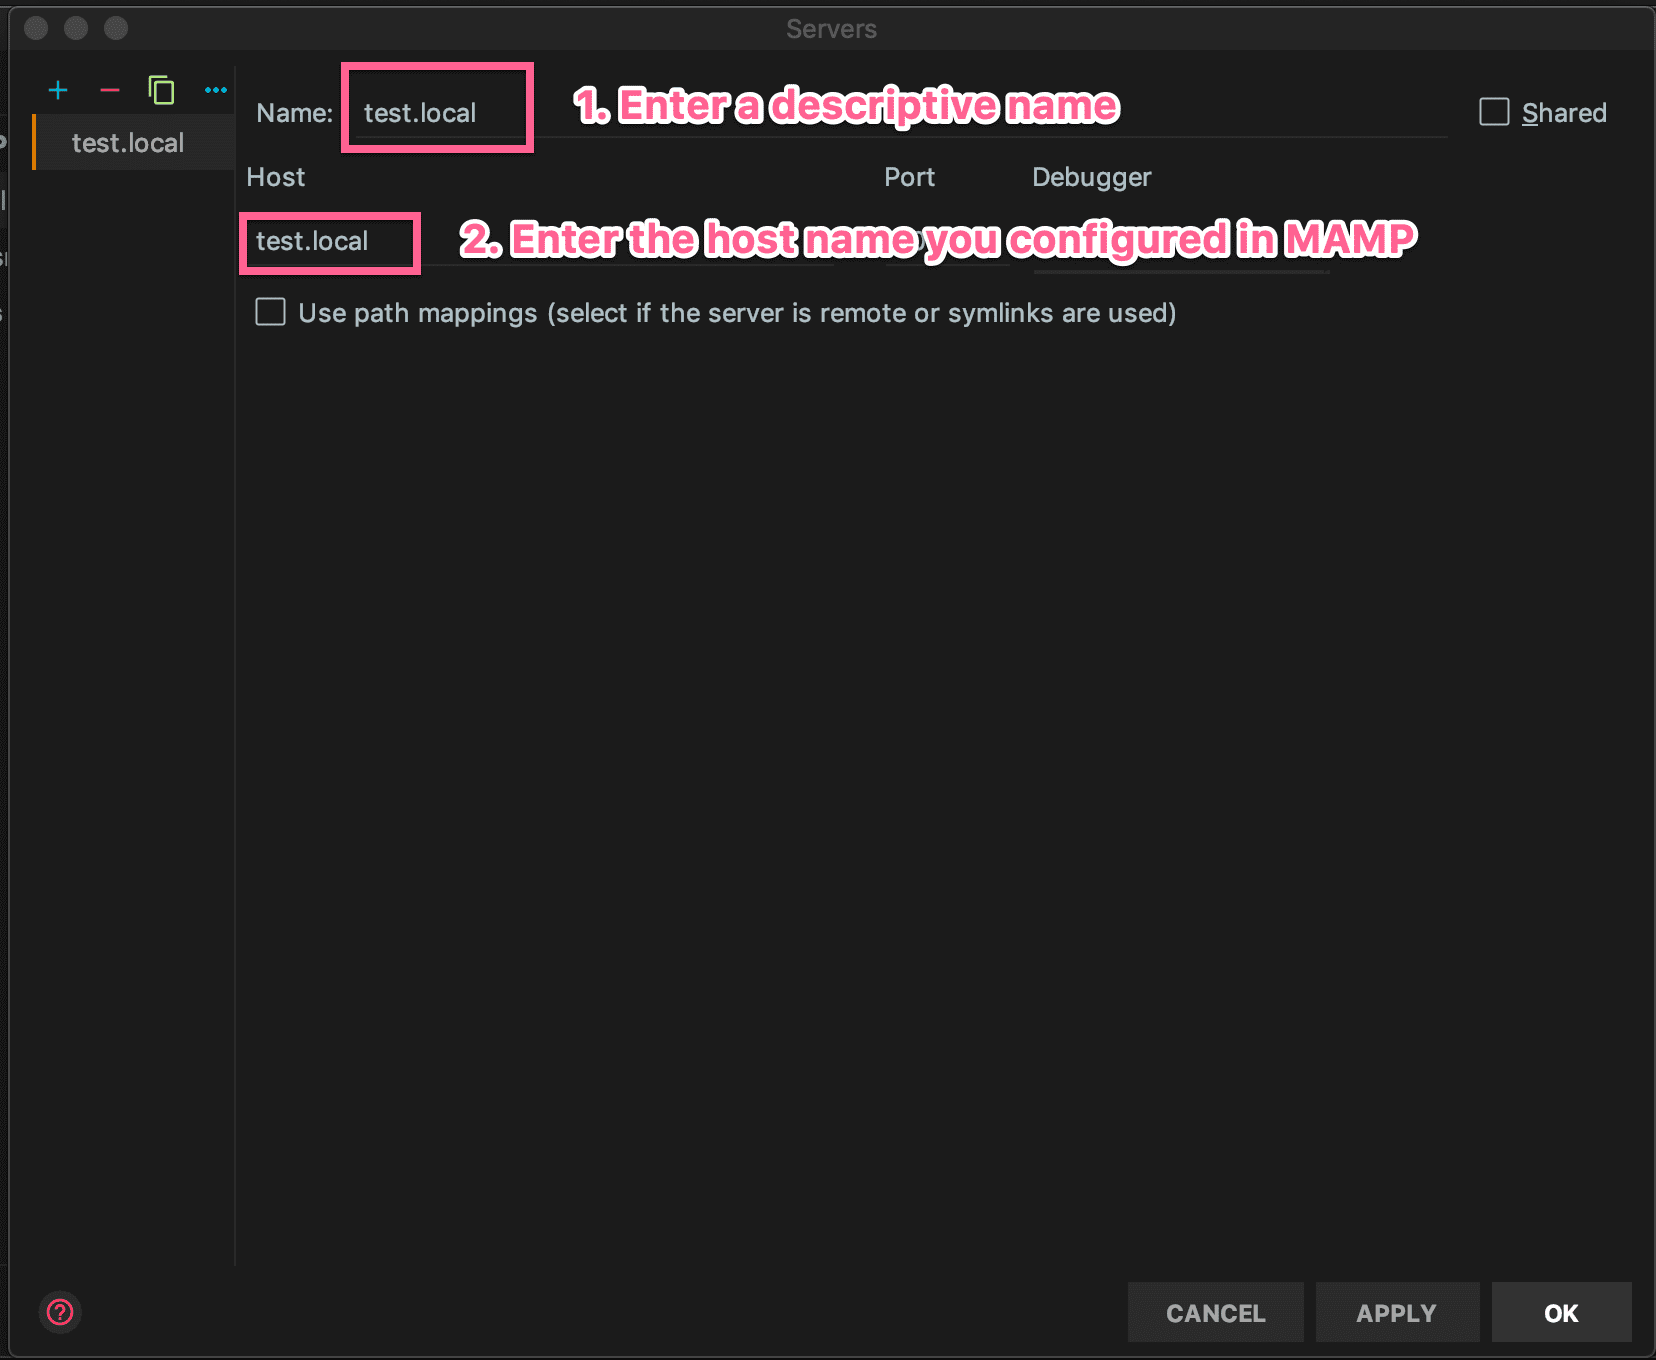
- Enter a descriptive name. I use the host name here as well. For the host, omit the http/https and just add the host name from MAMP.

- Click OK
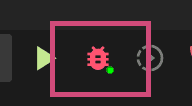
- Now add your breakpoints and click on the Debugger Button on the top right and PHPStorm will load the site into the browser and break when breakpoints are hit.

Happy debugging!