How to repair permissions on Linux Apache /var/www/html folder
I recently ran into an issue where I could no longer FTP files to my Linux droplet when multiple users were uploading to the server. The server kept the user as the owner despite me adding them to the www-data group. This fix comes from my ex-boss, James Tomasino who was kind enough to provide some help since I was stumped. I’m sharing in case anyone else runs into the same issue and finds it useful.
You’ll need to fire up terminal, ssh to the server, and then execute these commands:
cd /var/www
sudo chmod 775 html
sudo chgrp www-data html
sudo chmod g+s html
+s makes permissions sticky so that all files will inherit from the parent directory. This was the setting I was missing.
Open up /etc/ssh/sshd_config. I use nano so:
sudo nano /etc/ssh/sshd_config
Hit CTRL+W and look for “subsystem” which is typically located near the bottom of the file. Change
subsystem sftp /usr/lib/openssh/sftp-server
to
subsystem sftp /usr/lib/openssh/sftp-server -u 0002
If you already have files in the HTML folder, you’ll want to run these commands to reset the permissions:
cd /var/www/
sudo chgrp -R www-data html
find . -type f -exec chmod 664 {} \;
find . -type d -exec chmod 775 {} \;
(98)Address already in use: AH00072: make_sock: could not bind to address [::]:80 – error
I recently got handed a new Ubuntu droplet at work to setup and work on. I was going through the typical configuration to lock down the server and go to installing Apache when I suddenly ran into the error
(98)Address already in use: AH00072: make_sock: could not bind to address [::]:80 – error
I was a little surprised considering I had only run 4 commands total on a brand new installation. If you’re getting this error like me, you’ll need to find out what’s being bound to port 80 and then stop it. Use this command to get a list of anything that’s running on port 80.
sudo lsof -i:80
For me, it turned out nginx was running and bound to port 80. If you have the same problem, run this command to stop it:
sudo service nginx stop
Now you should be able to start apache.
Copy File Context to Clipboard via Command Line, Git Bash (Mingw64), or Terminal
I’ve been spending more time switching from SVN to Git and learning the command line options. I’m finding a lot of the Mac Git terminal commands I run aren’t the same in Git Bash (Mingw64). One of the commands I use is the pbcopy command to copy the ssh key to the clipboard to paste into Github and Bitbucket accounts. I’m starting to use it more as I am learning managing Linux servers and adding my key to login. I’m adding it here as a cheatsheet for myself but I thought others may find it useful.
On Windows, you can run this command to copy your ssh key to the clipboard:
clip < ~/.ssh/id_rsa.pubOn Mac:
pbcopy < ~/.ssh/id_rsa.pub
or if you want to view it in the terminal window:
cat ~/.ssh/id_rsa.pubHow to Copy and Paste into the Digital Ocean VNC Console
I recently signed up for Digital Ocean to test droplets for my development and linux management testing. I was securing the server and setup fail2ban, disabled the root login, and created a user account but forgot to change the user name from root to the user name I selected in my SSH client profile. I ended up locking myself out of the server and had to resort to logging into the admin panel on Digital Ocean’s website and use their browser embedded VNC client to restore my access. I quickly discovered that one of the downsides of using this panel is that you can’t copy and paste commands. Luckily there’s a workaround and you can use the browser console to do sendkeys through Javascript.
Bring up the console in the browser developer tools. Here’s a cheat sheet for keyboard shortcuts:
| Browser | Description | Windows | Mac |
|---|---|---|---|
| Chrome | Open Developer Tools and bring focus to the console | Ctrl + Shift + J | Cmd + Opt + J |
| Firefox | Open Console | Ctrl + Shift + K | Cmd + Opt + K |
| Internet Explorer | After hitting F12, you have to click the console tab. There’s no direct shortcut to the console tab. | F12 | N/A |
!function(){function t(){window.rfb.sendKey(e.shift().charCodeAt()),e.length>0&&setTimeout(t,10)}var e=prompt("Enter text to be sent to console").split("");t()}();

Update 9-21-16
Ruden and Sebastiaan’s pointed out there was a bug in the code above. This updated snippet has support for characters when using shift characters like !@#$%^&*()_+
!function(){function t(){function n(t,e){s=s.concat(RFB.messages.keyEvent(t,e))}var o=e.shift(),s=[],i=o.charCodeAt(),c=-1!=='!@#$%^&*()_+{}:"<>?~|'.indexOf(o),r=XK_Shift_L;c&&n(r,1),n(i,1),n(i,0),c&&n(r,0),rfb._sock.send(s),e.length>0&&setTimeout(t,10)}var e=prompt("Enter text to be sent to console").split("");t()}();You’ll receive a dialog prompt to enter the copy to paste in. Please note that you need to click on the VNC console and hit enter to execute the command.
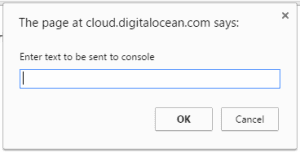
If you need to enter more than one command, just hit the up arrow on your keyboard in the console to get the script again for easy reuse.
How to fix “hacked by Moroccanwolf” WordPress site
A client of mine had their wordpress hacked and when you would load the site, it would simply display a message that said “hacked by Moroccanwolf”. I did some digging and luckily it wasn’t a major hack and they didn’t mess with the posts or other settings as a lot of the hacks do.
Quick Fix
- To fix it, you’ll need to connect to your database using an editor of some sort, such as PHPmyadmin.
- Once logged in, expand your database on the left.
- Click on ‘wp_options’.
- On the top right, click the ‘Browse’ tab.
- Look for ‘widget_text’ in the option_name field. (For my client, it was at row 90). You should see something similar to this:
<script>document.documentElement.innerHTML = unescape(''%48%61%63%6b%65%64%20%62%79%20%4d%6f%72%6f%63%63%61%6e%77%6f%6c%66%20%26%26%20%61%62%64%65%6c%6c%61%68%20%45%6c%6d%61%67%68%72%69%62%69'');</script>
Delete the entire tag and this should restore your website. Now remember to change your logins and update wordpress.
How I Figured it Out
Most of the hacks I’ve seen are done through injecting javascript into the database somewhere which either force a redirect or something along those lines. Here’s the steps I followed to find it:
- To fix it, you’ll need to connect to your database using an editor of some sort, such as PHPmyadmin.
- Once logged in, click on your database on the left. Ensure you’re on the database and not a table.
- Click Export.
- Leave it to quick and click go.
- You should now see a textbox with a mess of SQL commands.
- Copy and paste into your favorite editor,
- Search for <script> and you should find something that doesn’t belong. In this instance, that was the only thing I found of note.
- You’ll want to scan the rest of the database for things that don’t belong. Additionally, you’ll want to replace all the wordpress files and confirm no .htaccess files were created that give hackers write access.
When updating Office 2011 for Mac, you are prompted that you must close “Microsoft Database Daemon” and “SyncServicesAgent”
If you’re trying to update your install of Microsoft Office 2011 for Mac, you may get the following message:
“These applications must be closed before the software can be installed:
Microsoft Database Daemon
SyncServicesAgent
Close these applications and try again”
If you try to kill the apps using activity monitor, you’ll find they keep getting restarted. The only way I found that worked to stop them is by following the instructions below.
- Open a terminal window and enter the following command:
launchctl unload ~/Library/LaunchAgents/com.microsoft.LaunchAgent.SyncServicesAgent.plist
This will unload the SyncServicesAgent. Unfortunately the Daemon kept running for me after the latest update. To stop that, do the following:
- Open activity monitor
- Scroll down until you find Microsoft Database Daemon in the list of active applications.
- Click on Microsoft Database Daemon and click on the Quit Process button in the toolbar
Go back to the install utility and you should now be able to proceed with the install. Once the install is finished, you’ll want to restart the Sync Services Agent, so do the following:
- Go back to the terminal window and enter this command:
launchctl load ~/Library/LaunchAgents/com.microsoft.LaunchAgent.SyncServicesAgent.plist
Now you should be all set with updates and can close terminal.
How to Get Browser Name and Version via JavaScript
Today I ran into a strange issue where Firefox version 28 and below rendered style widths different than Firefox 29 and above. Firefox 29 and above appear to have fixed the issue and render sizes to match Chrome/IE8+/Opera/Safari. Unfortunately, as old as Firefox 28 is, our client’s legal review team is stuck on that version as IT refuses to let them upgrade. As such, we needed to add a kludge fix to the site to add a style to fix the issue for those running older Firefox versions. JQuery removed the version support from version 1.9 so here’s a handy script that will allow you to detect the browser and version without any extra dependencies.
function get_browser_info(){
    var ua=navigator.userAgent,tem,M=ua.match(/(opera|chrome|safari|firefox|msie|trident(?=\/))\/?\s*(\d+)/i) || [];
    if(/trident/i.test(M[1])){
        tem=/\brv[ :]+(\d+)/g.exec(ua) || [];
        return {name:'IE ',version:(tem[1]||'')};
        }
    if(M[1]==='Chrome'){
        tem=ua.match(/\bOPR\/(\d+)/)
        if(tem!=null)   {return {name:'Opera', version:tem[1]};}
        }
    M=M[2]? [M[1], M[2]]: [navigator.appName, navigator.appVersion, '-?'];
    if((tem=ua.match(/version\/(\d+)/i))!=null) {M.splice(1,1,tem[1]);}
    return {
      name: M[0],
      version: M[1]
    };
 }
Usage is very simple:
var browser=get_browser_info();
console.log(browser.name);
console.log(browser.version);
BONUS: If you need to detect a specific version and add special classes, here’s a quick snippet that will allow you to add a class to the HTML tag using plain old vanilla.js.
var browser=get_browser_info();
    if(browser.name == 'Firefox' && browser.version <= 28)
        {
            var root = document.documentElement;
            root.className += " firefox28";
        }
Kill Multiple Processes at Once Via Command Line with Taskkill
Ever have a program or process that doesn’t end properly and runs in the background continuously?
I recently encountered this issue with VLC on one Windows 7 machine where it keeps the process never terminates. Since I never reboot the machine for other than Windows Updates, this amounted to 633 copies of VLC running in memory. Each process only used about 633k so it wasn’t an astronomical memory hog but multiply that by 633, you begin to feel the machine slowing down. Task Manager doesn’t let you kill multiple processes in bulk and I didn’t want to go through killing them one by one or rebooting.
The solution? Good old command line. Open up command prompt (start -> run -> cmd.exe). This snippet will kill all processes that start with the taskname:
TASKKILL /IM [TASKNAME]* /F
To kill all VLC processes, you’d use:
TASKKILL /IM vlc* /F
All running VLC processes will be terminated automatically.
Did you know…?
Windows 7 sports tons of new features and surprises that have gotten little to no fanfare.
Did  you know that Microsoft has updated the Windows Calculator with Windows 7 with some really new and useful features? Previously, most of these features often required you to open Excel or use some website to solve the problems they address. The calculator sports new features including Unit Conversion, Date Calculation, Mortgage, Vehicle Lease, Fuel Economy (in both MPG and KM no less!) You can find the different options under the View menu after opening the calculator up. See screenshots below for examples of what the calculator can do.


